Practical Course Materials Science
Procedure
Testing procedure:
- Introduction
- Setup of the machine
- Preparing the specimen
- Preparing the test
- Clamping the specimen on the clamping setup
- Connecting the setup to the machine
- Inputting of various information
- Performing the test
- Result
You may use the items as chapter navigation.
More informations behind the icon
Result of measurement
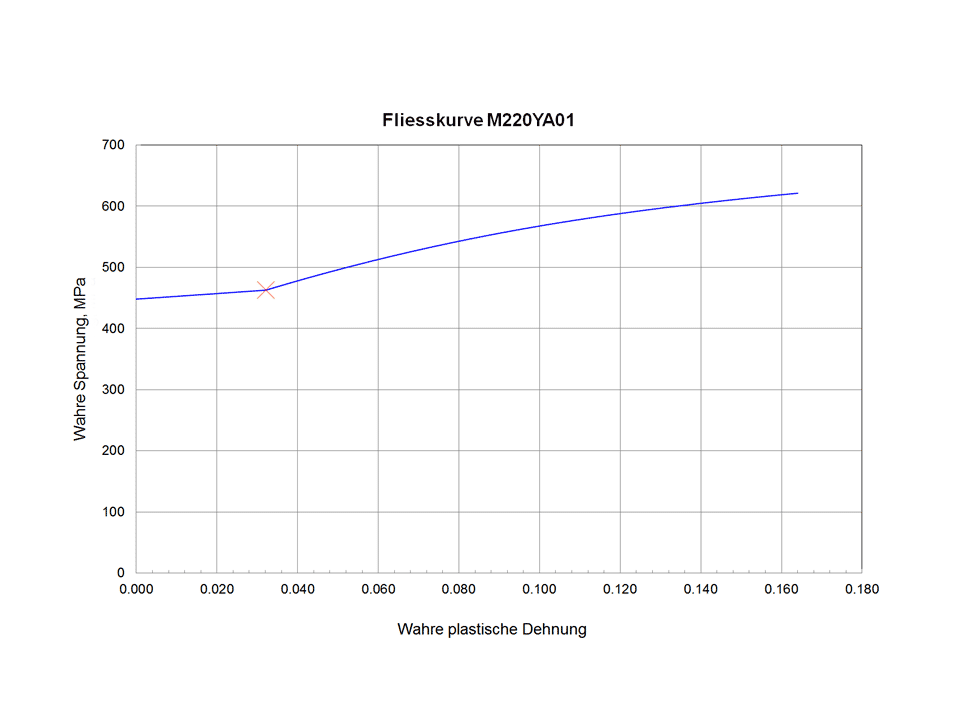
Strain Hardening Curve
Result of measurement
The student should evaluate a high speed tensile test. This evaluation contains:
- a smoothing spline for the stress-strain-diagram
- the mechanical properties of the material
- a strain hardening curve
For this an Excel-Makro is used which guide the student through the evaluation. How to work with this Makro you will find on the next page.
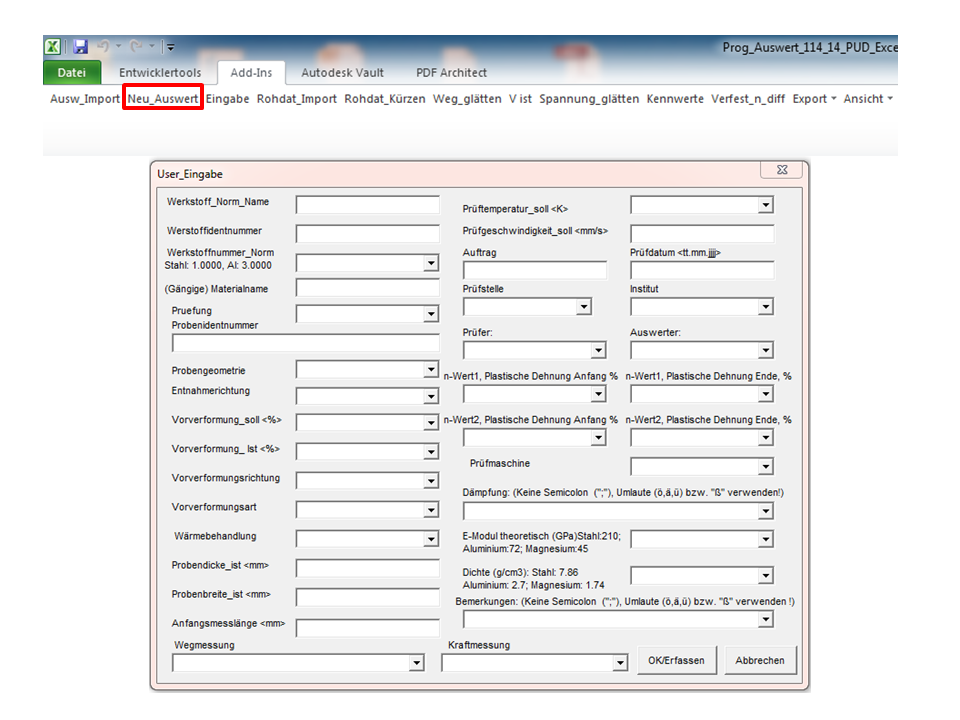
After starting the program it is necessary to give information
about the test parameters and the specimen. Fill in the
name of the specimen, the thickness, width and measuring
length of the specimen. For “Wegmessung” (strain measurement)
choose “Weg Zimmer Extensometer” (opto electronic extensometer)
and for “Kraftmessung” (force measurement) choose “Kraft
Piezoquarz”. The temperature is room temperature. The
other boxes can be left blank.
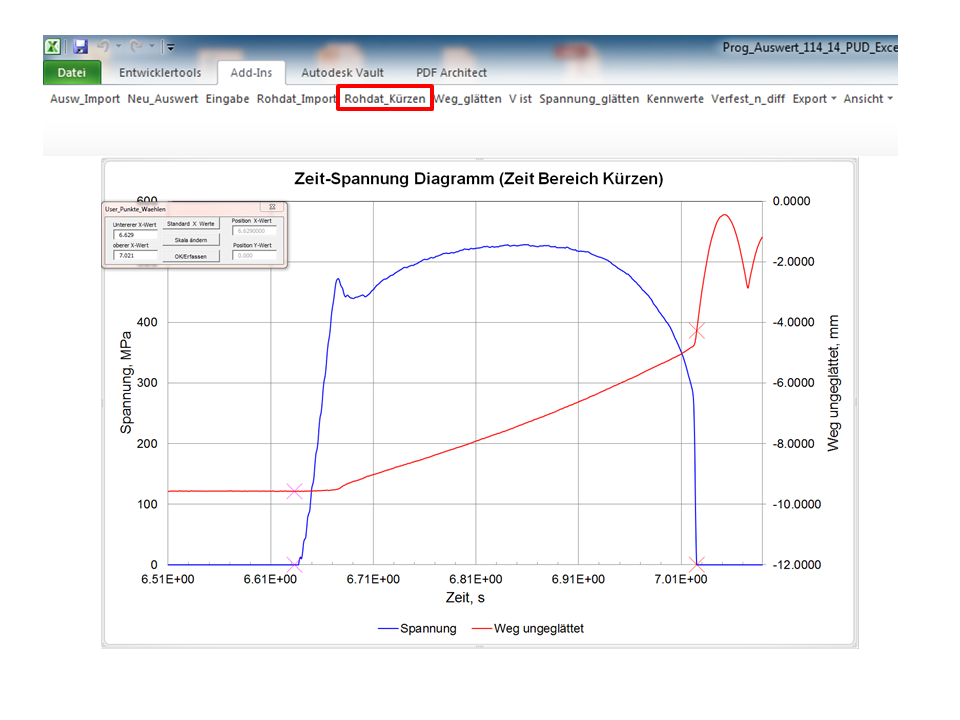
After this you can import the raw data using the “Rohdat_Import”
(raw data import) button.
Now it is necessary to reduce the raw data. Push on the next button in the top row above the diagram and define beginning and end of the experiment to determine the data for evaluation. To choose these areas move the red crosses by using the arrow keys.
The next step is to smooth the displacement data provided by the extensometer. Use the button “Weg_glätten” (smooth elongation) to get into the next menu. First you are asked if you want to split the signal into two parts. This is only necessary for a few materials which show a specific strain hardening behavior. In this case you can choose “Nein”. In the next window you should chose the weighting exponents for the beginning and the end of the smoothing function. Try to get a good fit with no oscillations. After determining the exponents chose “OK”. In the upcoming window chose “Ja”.
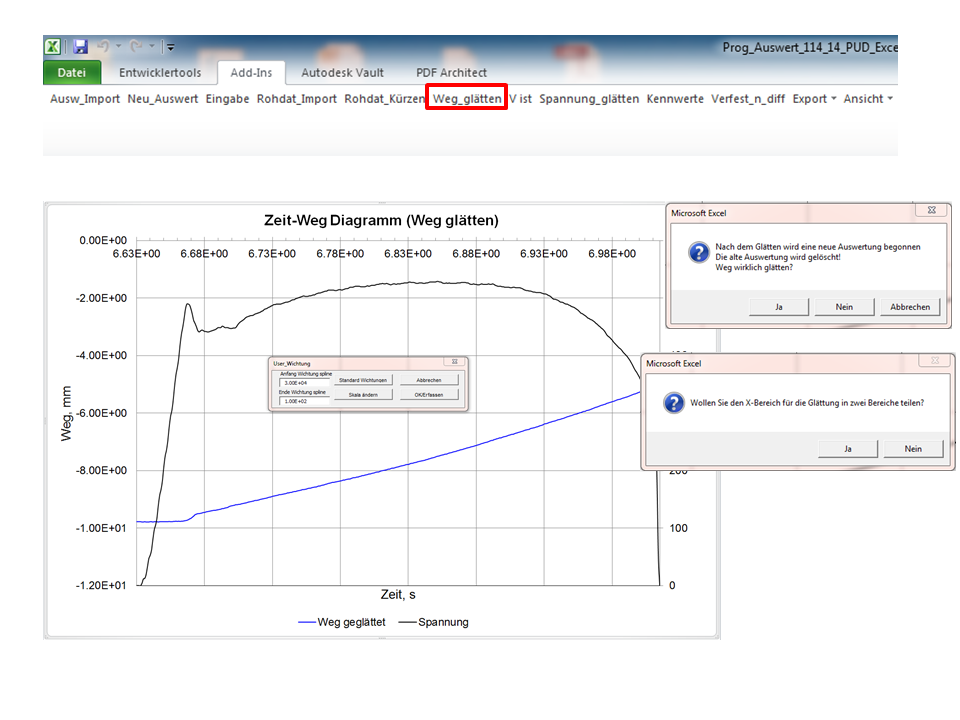
Now you can see the calculated smoothed data as red line as an overlay on the raw data. It should be in good agreement with the measured raw data but without oscillations. If the function satisfies your expectations choose “OK”.
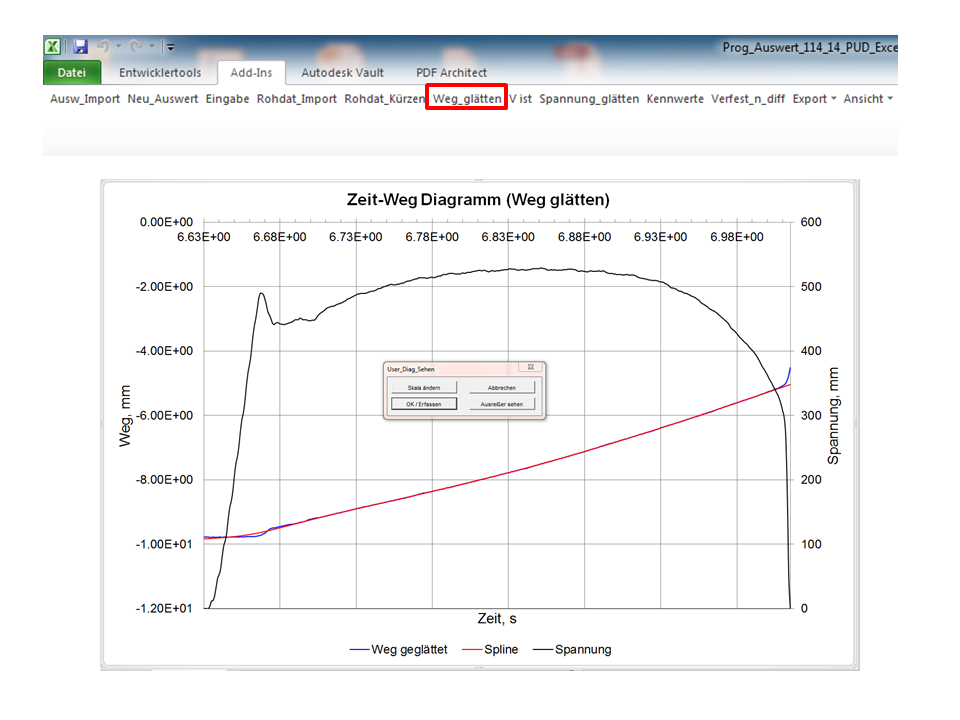
Here you can see the stress-displacement-diagram. The second (red) line gives an overview about the instantaneous strain-rate during the test. Now you can determine if the calculated strain-rate is high enough or too low.
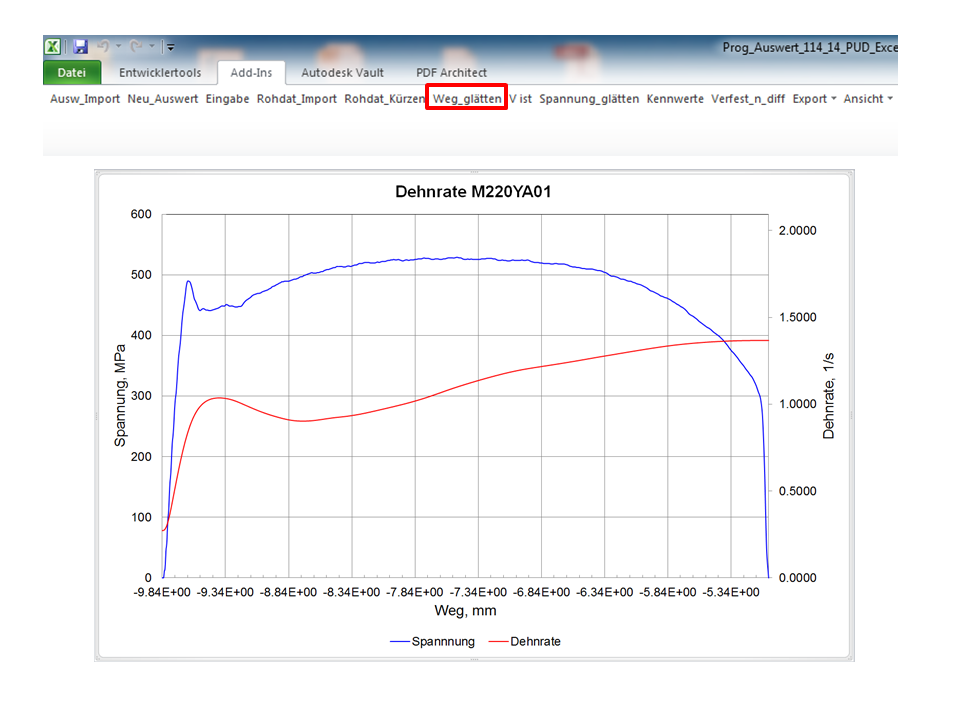
In the next step, the mean deformation speed during uniform elongation is evaluated. For this task it is necessary to choose the yield point as beginning of plastic deformation on the left side and the ultimate tensile strength of uniform elongation respectively on the right side. Between these two points the software computes the strain rate of the test.

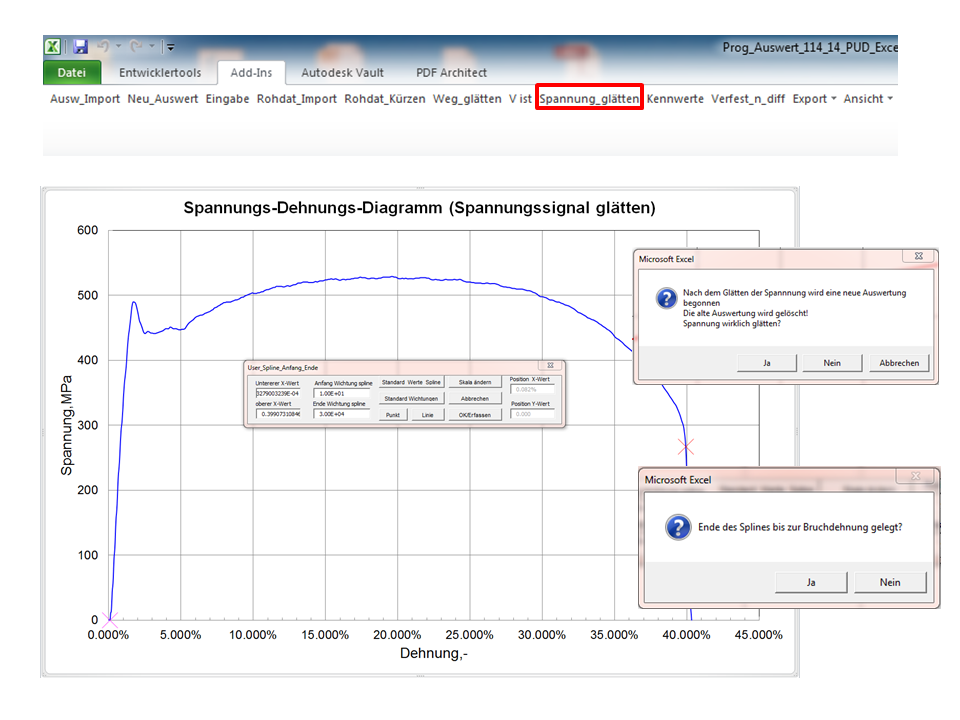
In the next step the stress signal has to be smoothed, too. In the case of discontinues yielding, the first cross should be placed close to the beginning of the experiment before the Lüders strain. The weighting exponents have to be chosen to get a smoothened stress signal without oscillations. The second cross should be placed at fracture elongation.
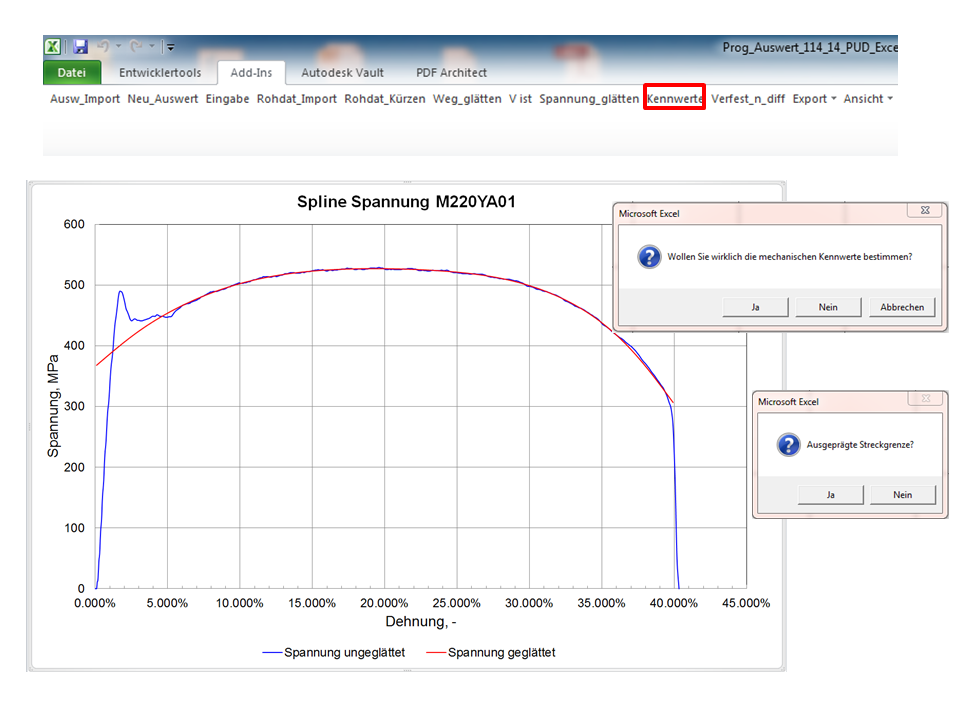
Now the mechanical properties can be determined. For this task choose “Kennwerte” (mechanical properties) and decide if there is discontinues yielding in your test. Use the arrow keys to fix the elastic part and Rel as well as ReH.
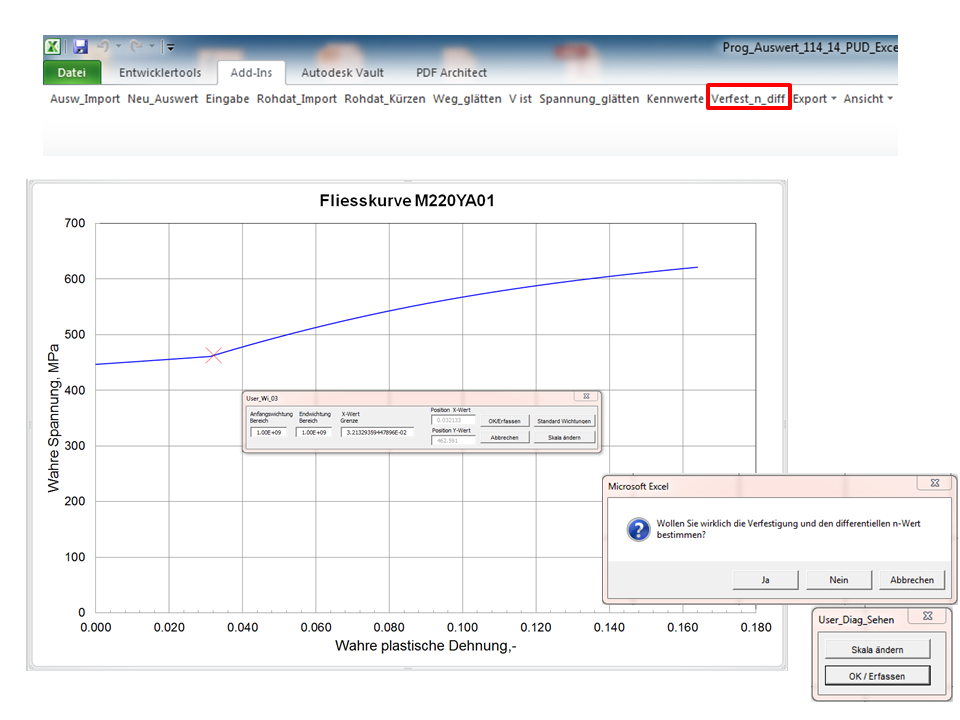
The strain hardening curve can be calculated by using the “Verfest_n_diff” function. The starting point should be placed after discontinues yielding. Choose your weighting exponents and try to get a good fit.
Evaluation
The steps to evaluate the specimen:
-
Step 1:
Necessary information -
Step 2:
Reducing the raw data -
Step 3:
Smoothing the displacement data -
Step 4:
Calculated smoothed data -
Step 5:
Stress-displacement-diagram -
Step 6:
Evaluating the mean deformation speed -
Step 7:
Smoothing the stress signal -
Step 8:
Determing the mechanical properties -
Step 9:
Calculating the strain hardening curve
Practice
Checklist the steps
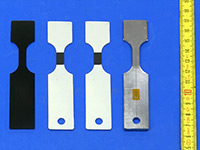
Preparing the specimen
- The specimens need to be painted.
- A strain gauge strip is attached to the head area.
Preparing
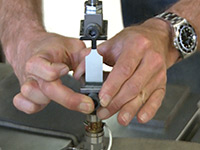
- Clamp the specimen straight and without any application of bending moments on the clamping setup.
- Connect the setup to the machine by two threads.
- Enter various information to the test programm:
Settings of the extensometer, the specimen name, the number, the location of the strain gauge strip, the strain rate and piston position.

The test
- Starting the test requires the confirmation of the computer program.
- Observe the experiment.
- A force-time-curve and a displacement-time-curve will be plotted.