Practical Course Materials Science
Procedure
Testing procedure:
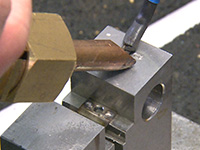
- Preparing the specimen
- Polishing both sides of the specimen underneath the notch.
- Use a scratch gauge to mark three load levels.
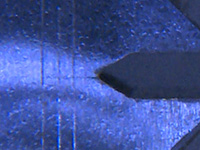
- Generating a fatigue crack
- Insert the CT-specimen to the test machine. Fix it by two bolts.
- Calculate the middle load and the oscillation amplitude.
- Enter the values to the machine and switch the machine into load controlled mode.
- Start the transcient oscillation process.
- Check the crack length constantly.
- As soon as the fatigue crack is long enough, stop the machine.
- Preparing the specimen for the fracture test
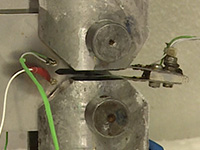
- Fix the power connection for potential measurement.
- Fix the clip-gage-brackets for the widening measurement of the crack tip.
- Fix the potential contacts on both sides of the specimen.
- Attach the thermos-element for the temperature measurement.
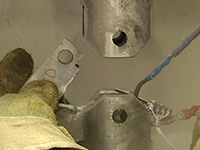
- Preparing the fracture test
- Insert the specimen into the test machine. Fix it by two bolts.
- Wire and assemble the clip-gages.
- Switch on the cooling and wait for the defined temperature.
- Turn on the power source for starting the direct current potential drop (DCPD) method.
- Tare the measurement channel and start the machine.
- Performing the fracture test
- Finishing the test
- Export the data to the project folder.
- Disassemble and take out the specimens of the machine
- Conserve the CT specimen.
You may use the items as chapter navigation.
For more informations click the icons above
Result of measurement
Brittle fracture at low temperatures
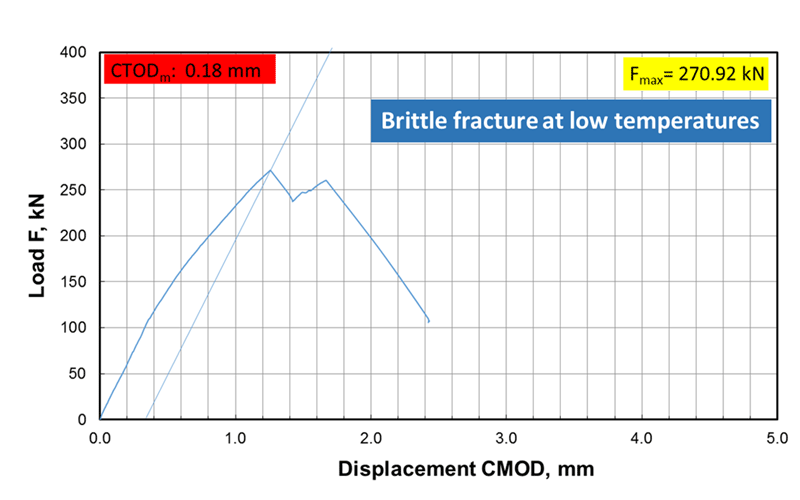
Brittle fracture
The presented figure is a typical load–displacement response of fracture mechanics tests at low temperatures.
The dominant fracture mechanism for steels at low temperature is cleavage fracture. The sample was deformed only elastically or with very minor plastic deformation in principle.
Ductile fracture at high temperatures
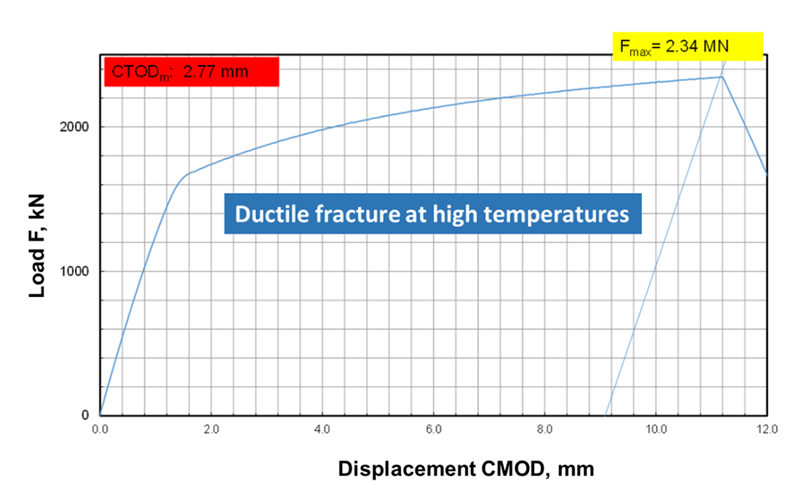
Ductile fracture
The presented figure is a typical load–displacement response of fracture mechanics tests at high temperatures.
The dominant fracture mechanism for steels at high temperature is ductile fracture. The sample was deformed elasto-plastically.
Fracture surface of samples with brittle fracture
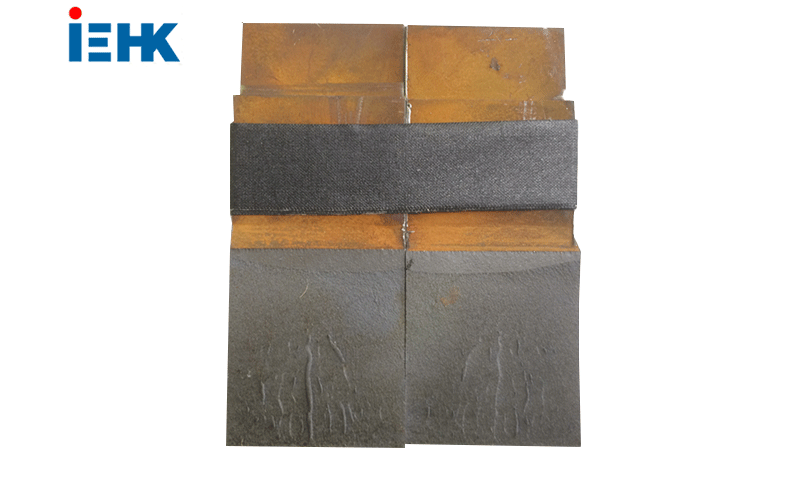
Brittle fracture
The presented figure is a typical fracture surface morphology of fracture mechanics test samples with brittle fracture.
As the fracture mechanism is cleavage fracture, the fracture surface features a sharp and clean shape and a light colour.
Fracture surface of samples with ductile fracture
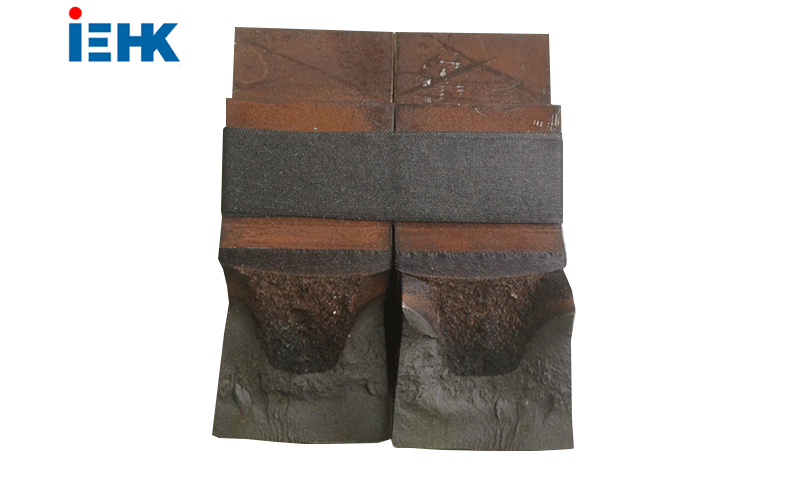
Ductile fracture
The presented figure is a typical fracture surface morphology of fracture mechanics test samples with ductile fracture.
As the fracture mechanism is ductile fracture, i.e. dimple fracture and shear fracture, the fracture surface features a dark colour and more deformed shape with shear-lips at both sides.
Practice
Checklist the steps

Preparing the specimen
- Polish 1cm2 of the specimen underneath the notch on both sides.
- Use a scratch gauge to mark three load levels.
In general, the fatigue crack length is half of the specimen height
Caution! Do not touch the polished surface anymore after polishing.
Prepare the servo hydraulic testing machine
- Insert the CT-specimen to the test machine by fixing the two bolts.
- Calculate the middle load and the oscillation amplitude.
- Enter the values to the machine program and switch the machine into load controlled mode.
- Start the transcient oscillation process.
- Check the crack length constantly.
- As soon as the fatigue crack is long enough, stop the machine.
Using of the point welding device
- Fix the power connection for the potential measurement.
- Insert and fix the clip-gage-brackets for the widening measurement of the crack tip.
- Fix the potential contacts on both sides of the specimen.
- Attach the thermos-element for the temperature measurement with decreased power of the welding device.
Preparing and performing the test
- Insert the specimen into the test machine. Fix it by two bolts.
- Wire and assemble the clip-gages.
- Switch on the cooling and wait until the defined temperature of the specimen is reached.
- Turn on the power source for starting the direct current potential drop (DCPD) method.
- Tare the measurement channel and start the machine.
Finishing the test
- Export the data to the project folder.
- Disassemble and take out the specimens of the machine.
- Break the specimen in two pieces to identify stable crack propagation.
- Conserve the CT specimen.
If the specimen is not fully broken, burn the specimen and put it in liquid nitrogen.