Practical Course Materials Science
Procedure
Testing procedure:
- Introduction
- Preparation
- Work materials and protective equipment complete?
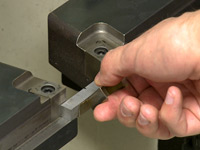
- Place specimens in the specimens holder
- Temper the specimens in liquid Nitrogen
- Wear the protective equipment
- Put the tank with the liquid Nitrogen in a place closed to the stryrofoam container
- Fill the liquid Nitrogen into the styrofoam container
- Close the valve of the tank and put the tank away carefully
- Put the specimens and specimens holders together with the holder in the liquid Nitrogen
- Let they temper for 20 min.
- Temper the specimens in climatic chamber
- Turn on the climatic chamber
- Adjust the thermostat at the desired temperature
- Open the valve for the liquid Nitrogen supply
- Wear the protective equipment
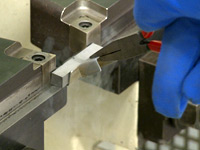
- Put the specimens together with the holder in the climatic chamber
- Cool down until the desired temperature is reached
- Empty test
- Fix the hammer in the initial height
- Check the safety lock carefully
- Reset the pointer to zero
- Release the security lock
- Break the hammer
- Check the friction losses. It should be less than 1.5% of the total energy of the impact hammer
- Test at room temperature
- Fix the hammer in the initial heigh
- Check the safety lock carefully
- Reset the pointer to zero
- Start the measuring software, input the information of experiment and start recording
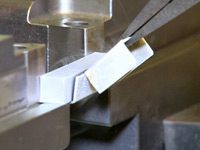
- Position the specimen 1 on the supports
- Release the security lock
- Record the Charpy impact energy and input it into the software
- Test at -196°C
- Fix the hammer in the initial heigh
- Check the safety lock carefully
- Reset the pointer to zero
- Start new test, input the information of experiment and start recording
- Take out the specimen 2 from the liquid Nitrogen and position it on the support immediately
- Release the security lock
- Record the Charpy impact energy and input it into the software
- Test bei -85°C
- Fix the hammer in the initial heigh
- Check the safety lock carefully
- Reset the pointer to zero
- Start new test, input the information of experiment and start recording
- Take out the specimen 3 from the climatic chamber and position it on the support immediately
- Release the lock
- Record the Charpy impact energy and input it into the software
You may use the items as a chapter navigation.
More informations behind the icon
Result of measurement
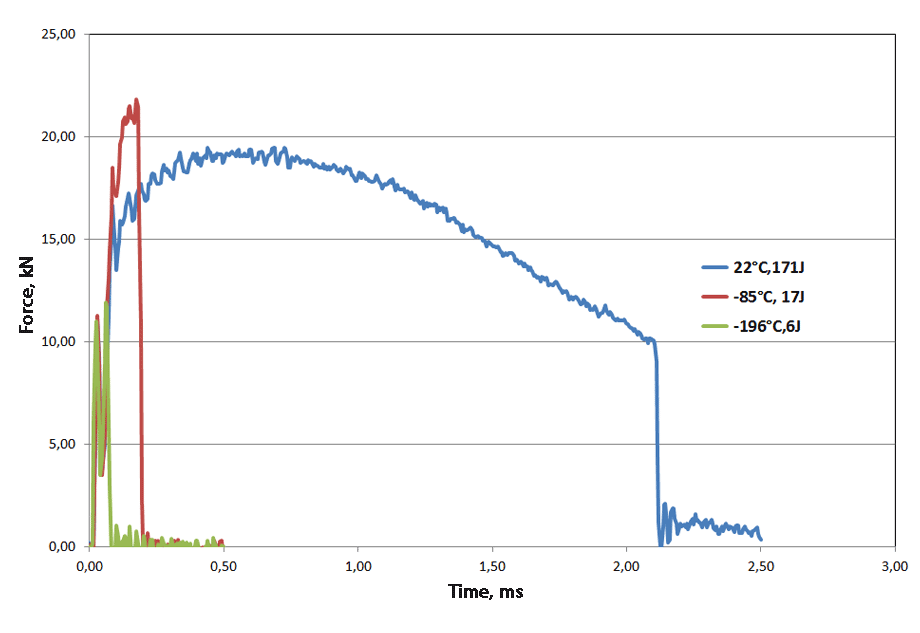
Impact energy at different temperatures
Result
The experiment course deals with the Charpy impact test. In the course a material will be tested at different temperatures
to characterize the temperature-dependent energy absorption during
fracture.
The values obtained should be interpreted.
Exemplary curves and close-ups of the fracture you will find here: "Individual test results".
Individual test results
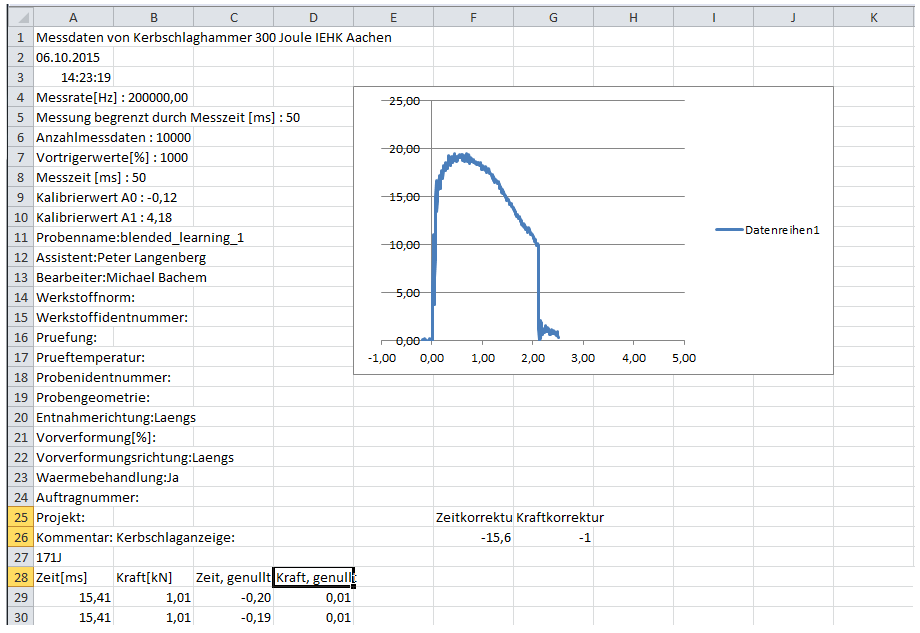
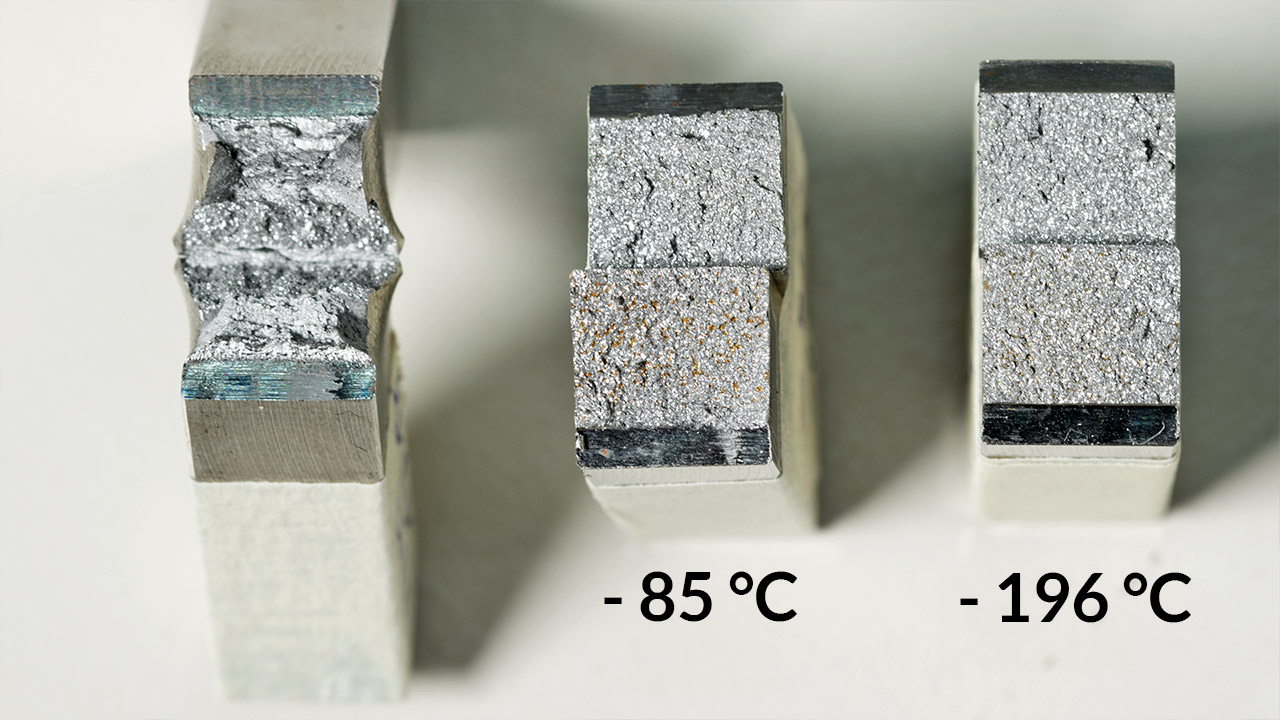
- Result at 22° C
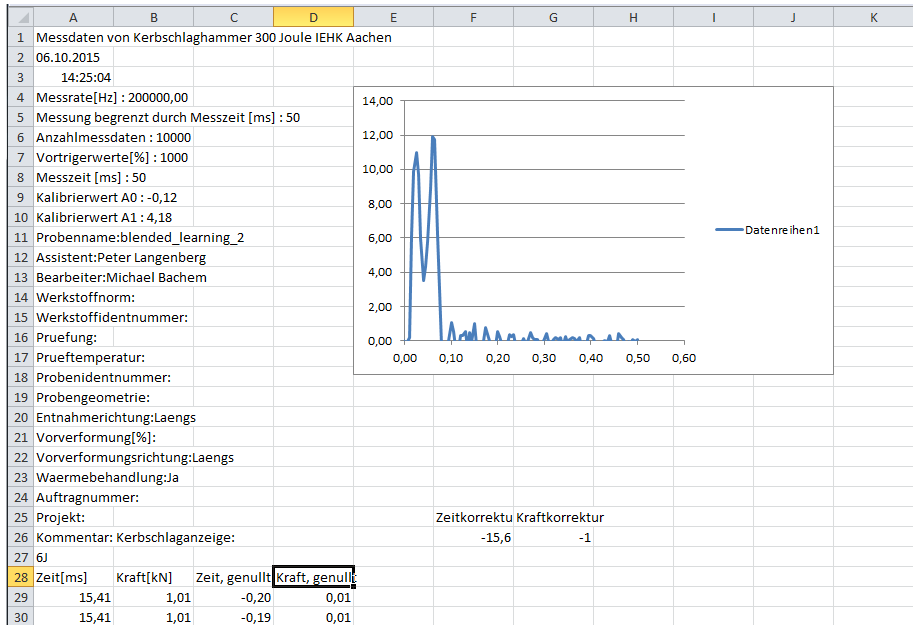
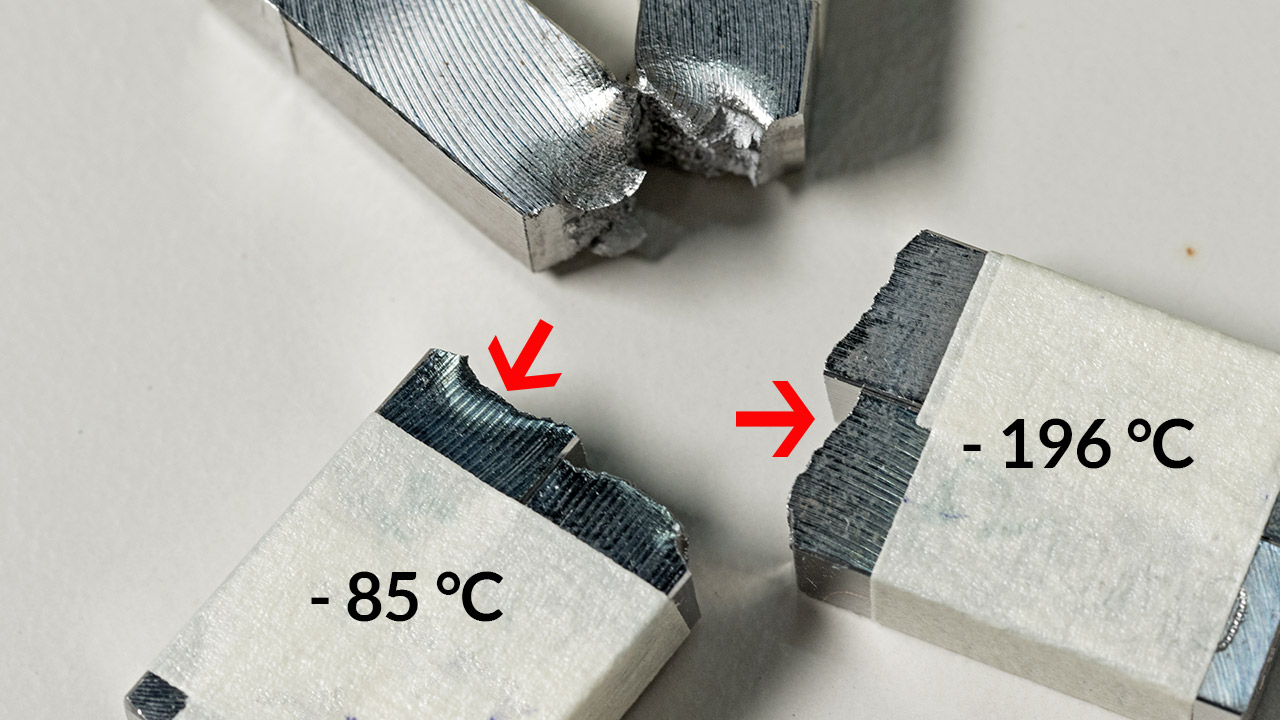
- Result at -196° C
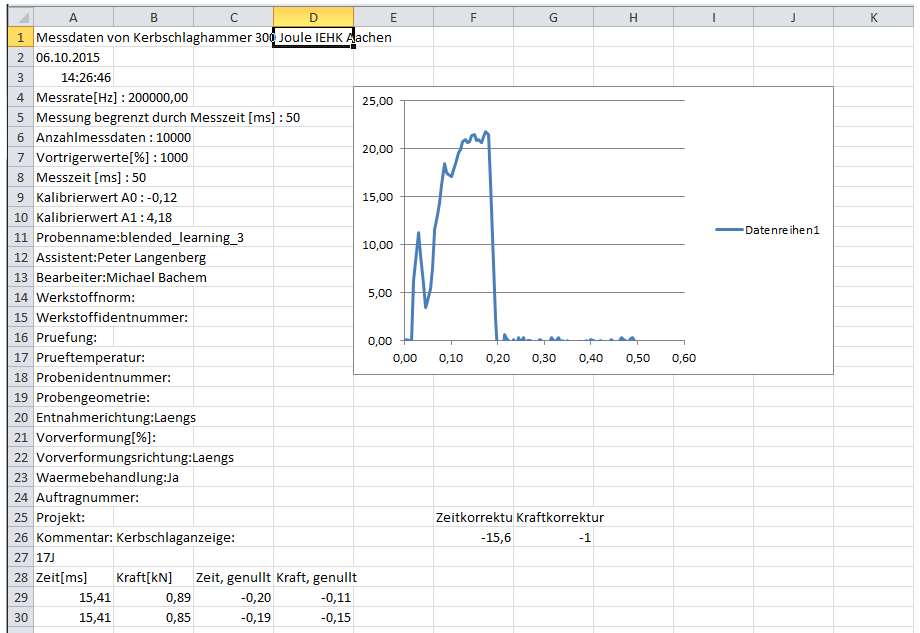
- Result at -85° C
- Close-up: area of fracture
- Close-up: fracture edge
The values obtained in the experiment are interpreted during the course.
Practice
Checklist The steps
Preparation
- Work materials and protective equipment complete?
- Put specimen on the specimen holder

Temper at -196 °C
- Wear the protective equipment
- Put the liquid Nitrogen tank in a place closed to the styrofoam container
- Fill the liquid Nitrogen into the styrofoam container
- Close the valve of the tank and put it away carefully
- Put the specimen together with the holder in the liquid Nitrogen
- Let temper for 20 min.
Attention! During work wear protective equipment!
Temper in climatic chamber
- Turn on the climatic chamber
- Adjust the thermostat at a desired temperature
- Open the valve for the liquid Nitrogen supply
- Wear the protective equipment
- Put the specimen together with the holder in the climatic chamber
- Cool down until the desired temperature is reached
Attention! During work wear protective equipment!
Empty test
- Fix the hammer in the initial height
- Control the security equipment carefully
- Reset the pointer to zero
- Release the security lock
- Brake the hammer
- Check the friction loss
Room temperature
- Fix the hammer in the initial height
- Control the security equipment carefully
- Reset the pointer to zero
- Start the software measurement, input the information of experiment, click on the button "Versuch starten"
- Position the specimen 1 on the supports
- Release the security lock
- Record the Charpy impact energy and input it into the software
At - 196 °C
- Fix the hammer in the initial height
- Control the security equipment carefully
- Reset the pointer to zero
- Click on the button "Neuen Versuch starten", input the information of experiment, click on the button "Versuch starten"
- Take out the specimen 2 from the liquid Nitrogen and position it on the supports immediately
- Release the security lock
- Record the Charpy impact energy and input it into the software
Attention! During work wear protective equipment!
At -85 °C
- Fix the hammer in the initial height
- Control the security equipment carefully
- Reset the pointer to zero
- Click on the button "Neuen Versuch starten", input the information of experiment, click on the button "Versuch starten"
- Take out the specimen 2 from the climatic chamber and position it on the supports immediately
- Release the security lock
- Record the Charpy impact energy and input it into the software
Attention! During work wear protective equipment!