Fatigue Test
Practical Course Materials Science
Practical Course Materials Science
You may use the items as chapter navigation.
For more informations click this symbol
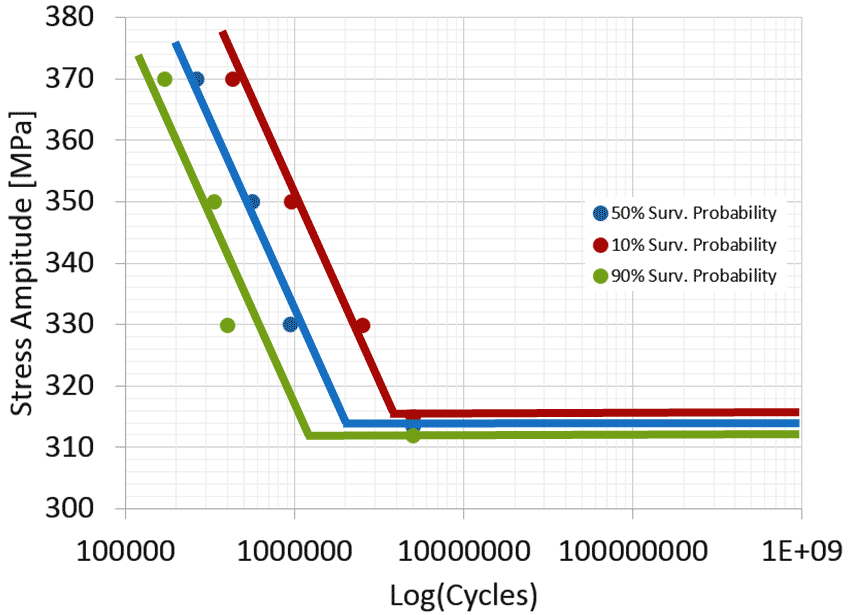
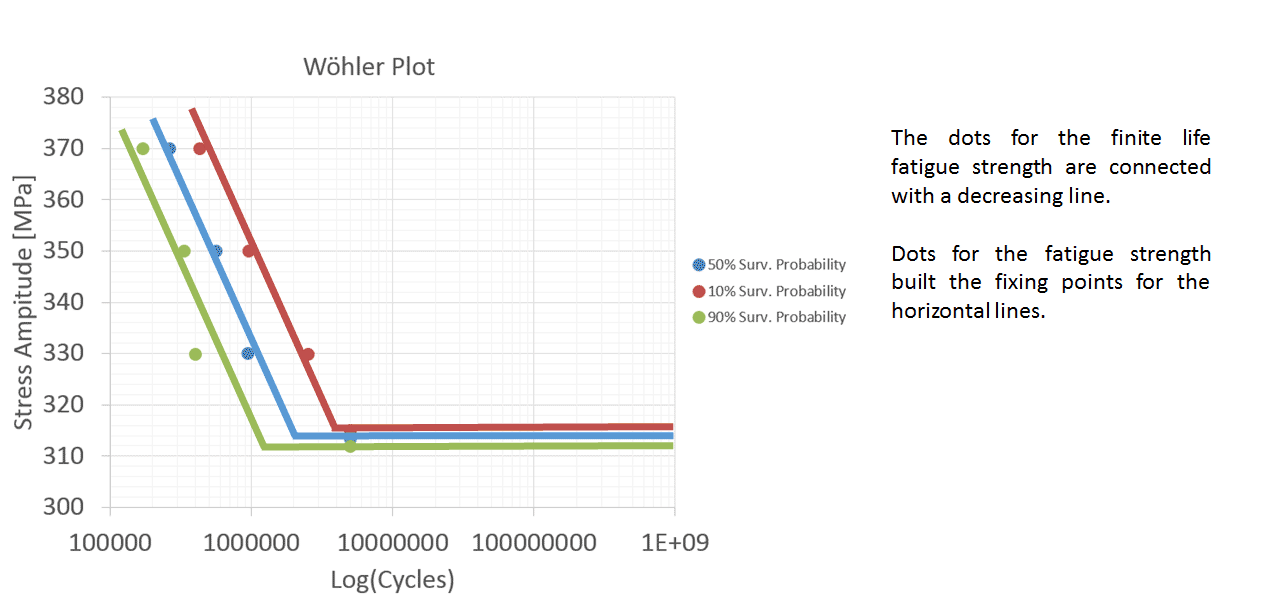
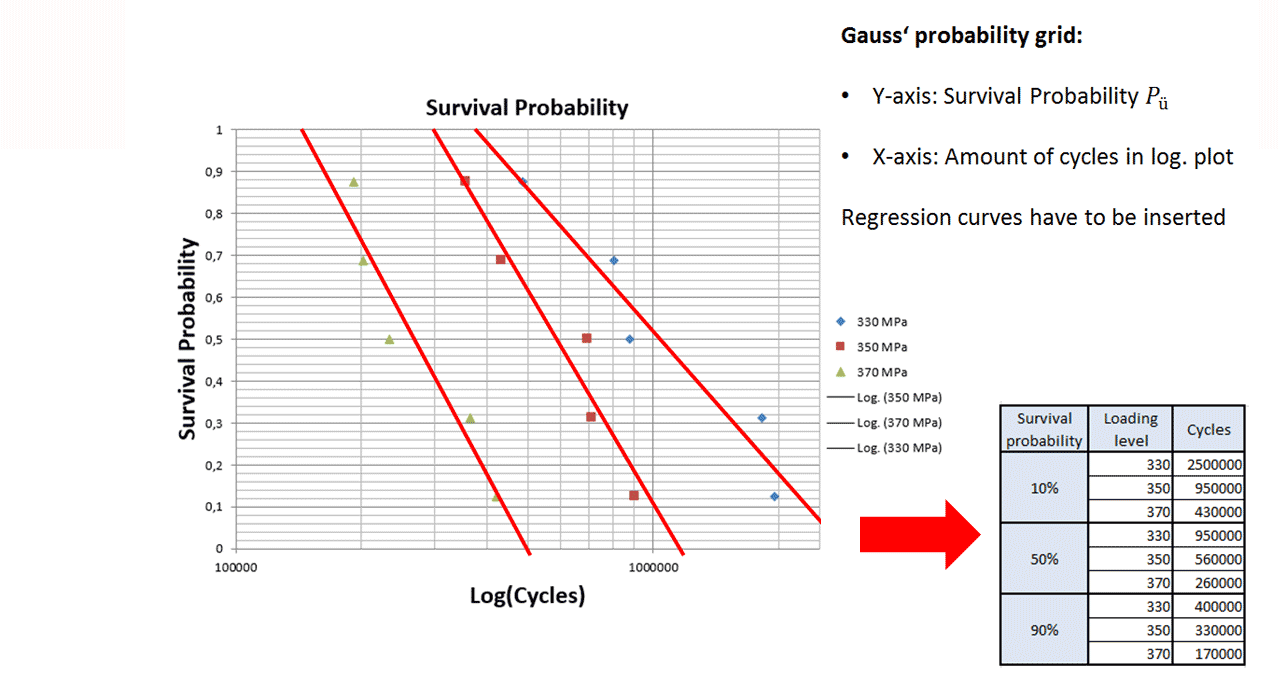
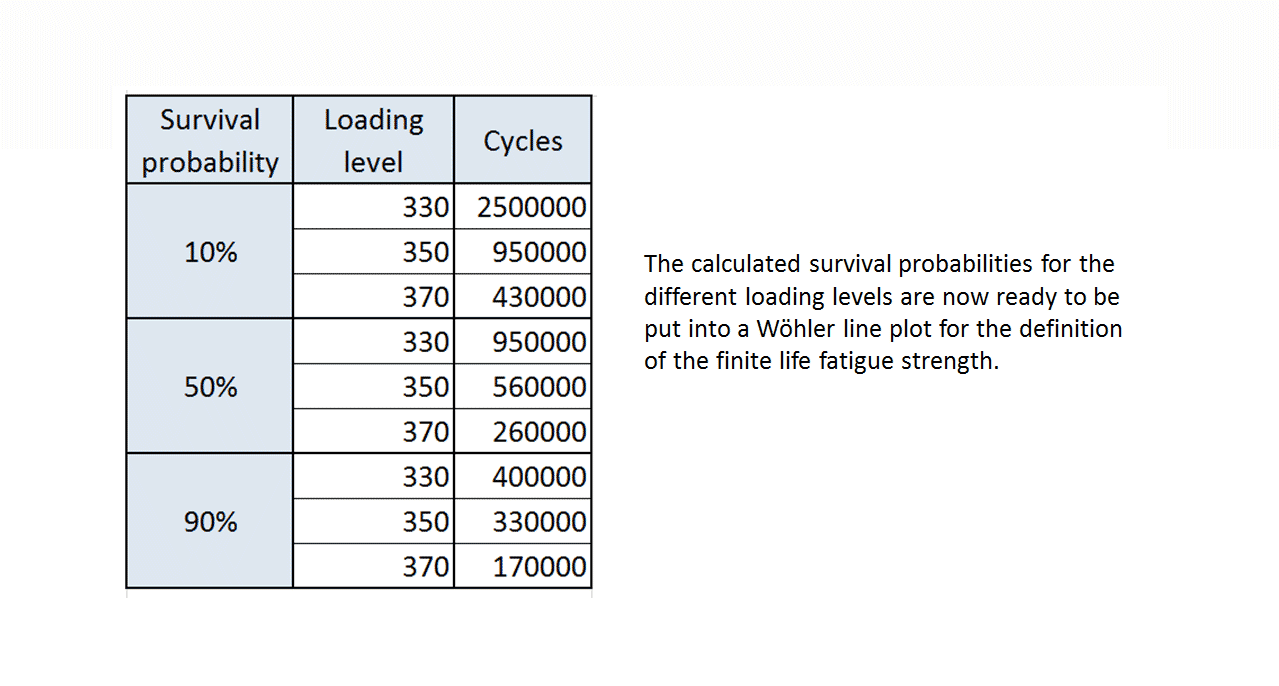
Based on experimental results along with the calculations of the finite life and fatigue strength the Wöhler line can be determined.
In this practical course you have to determine
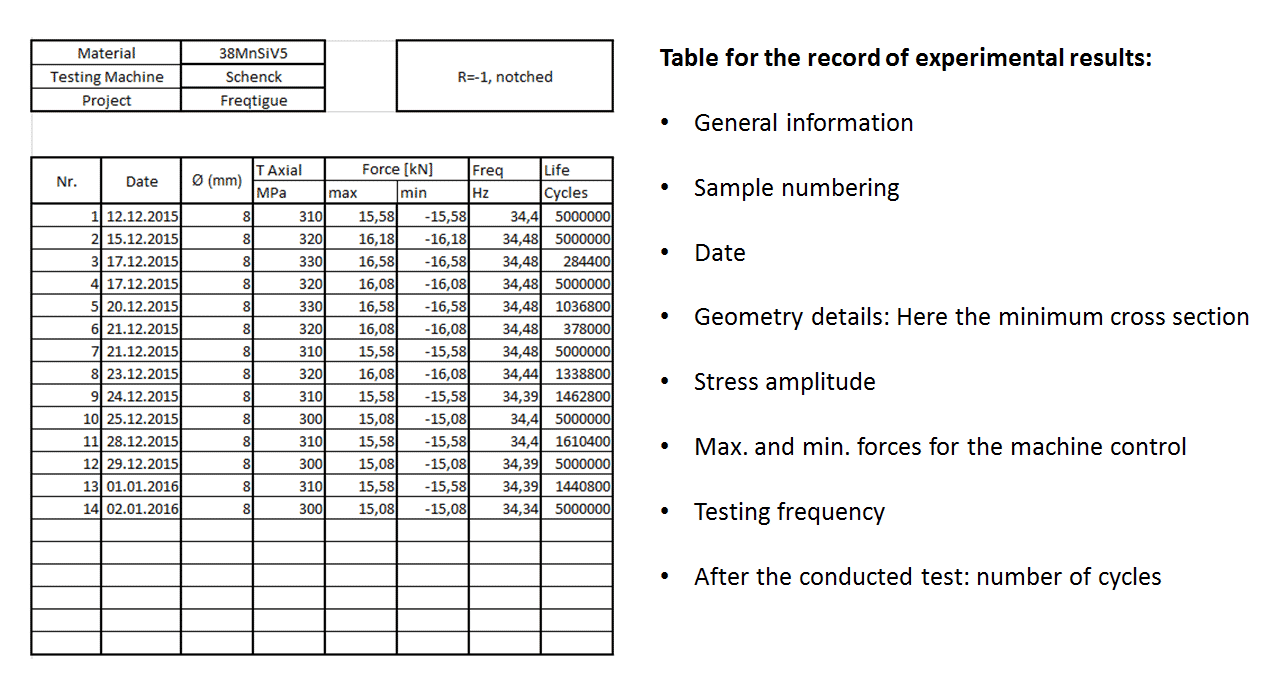
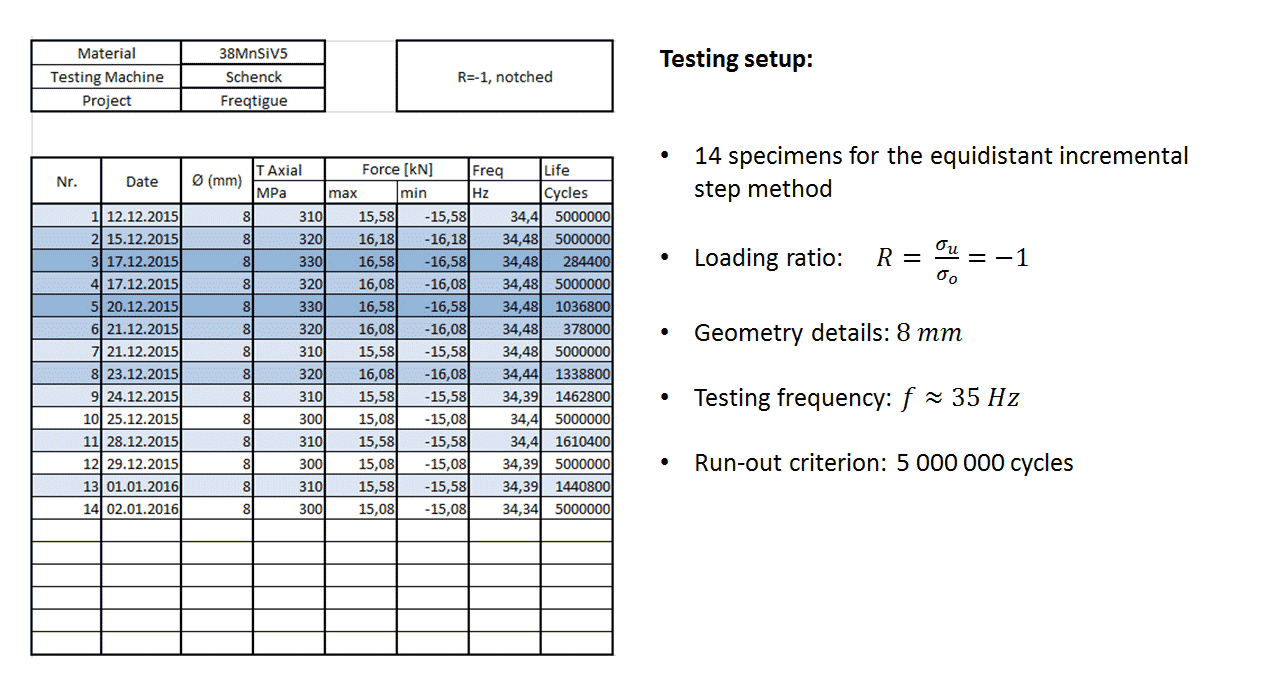
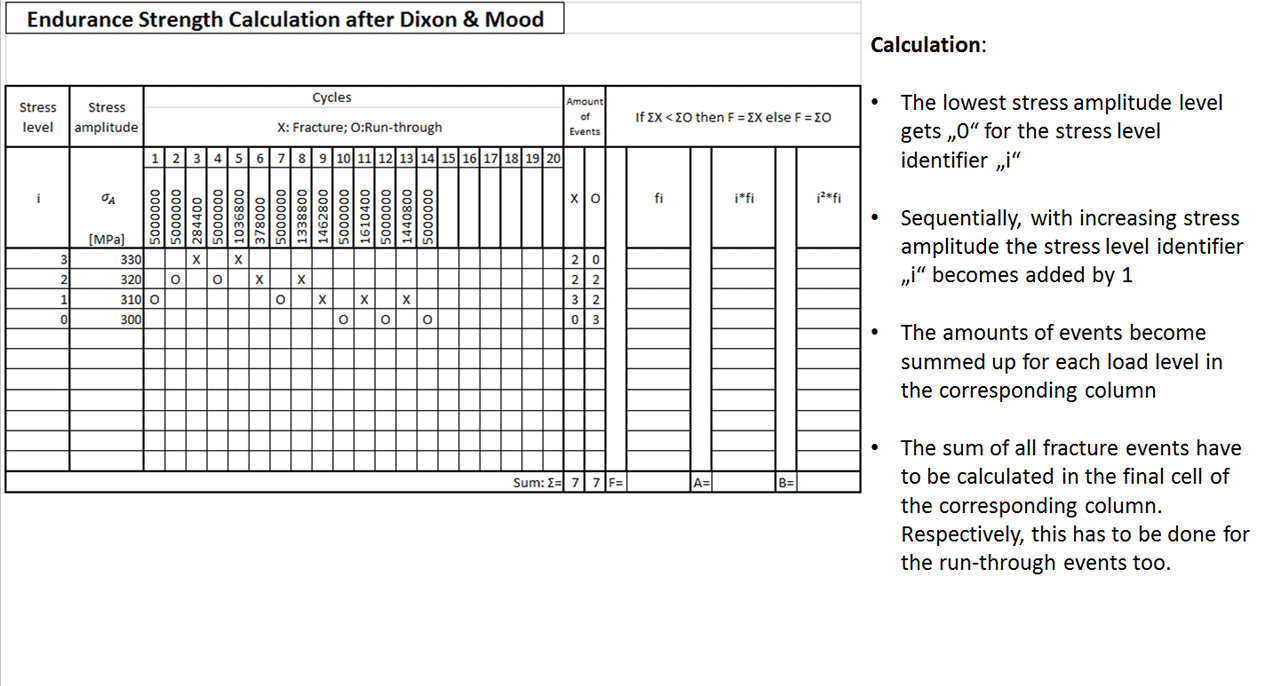
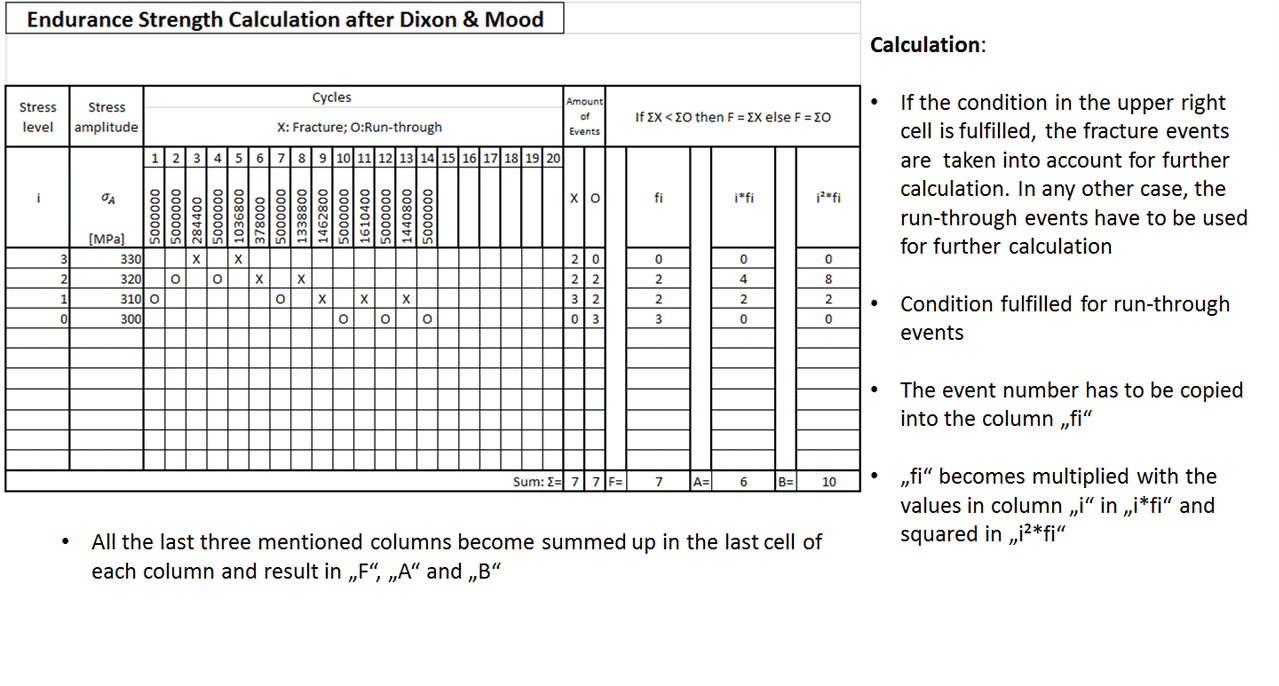
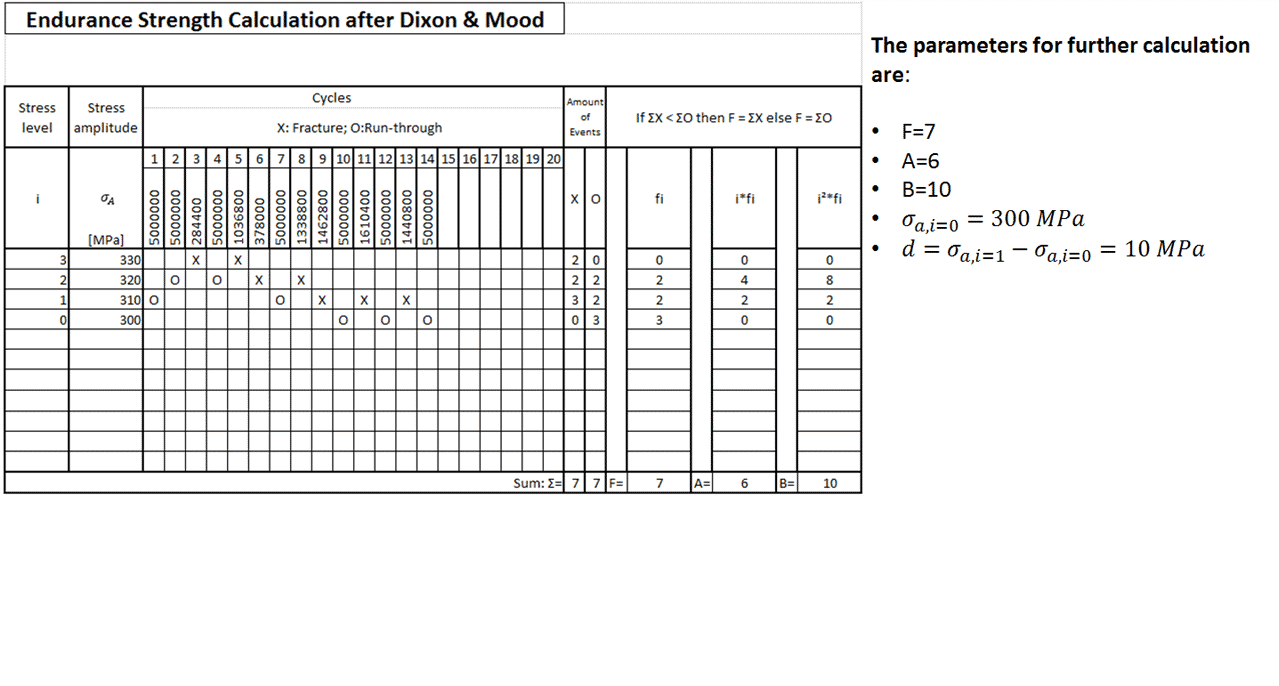
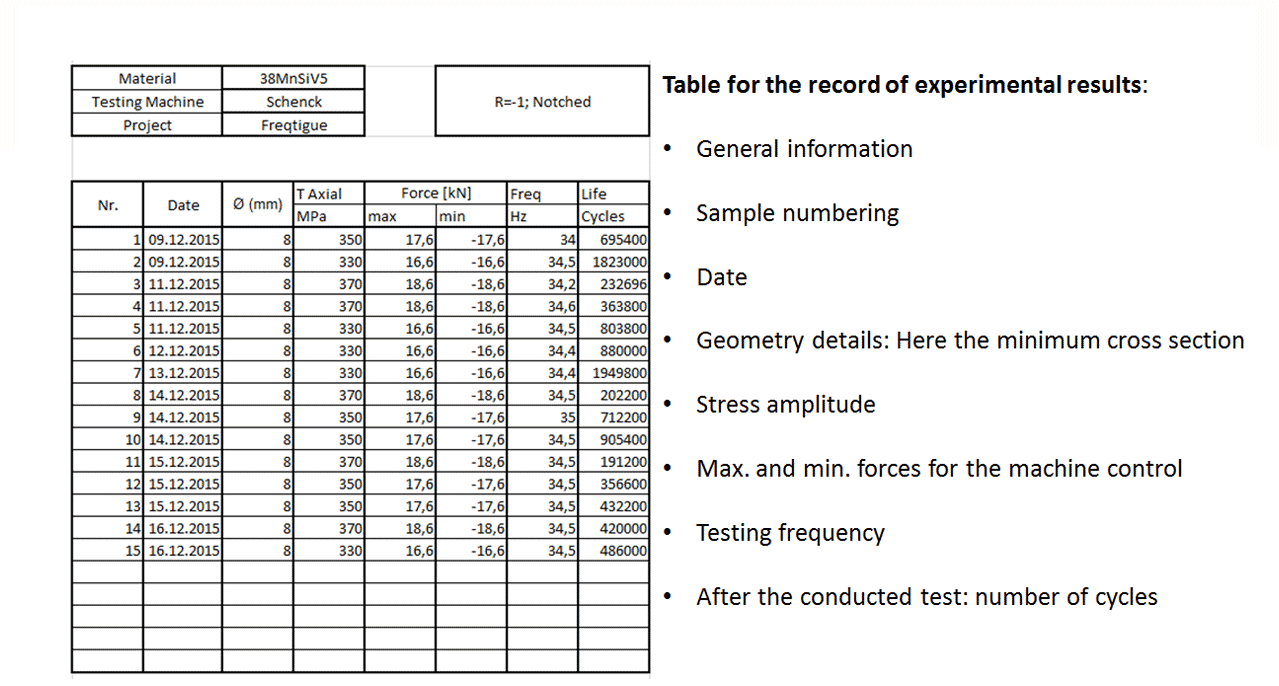
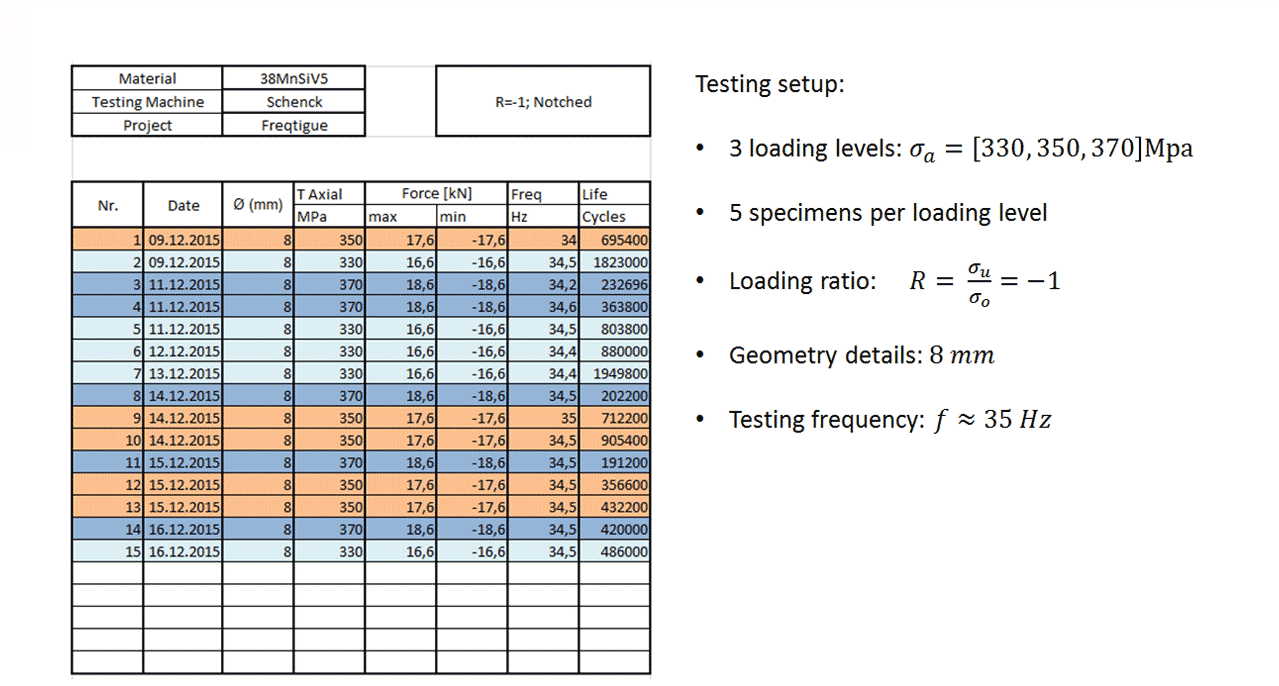
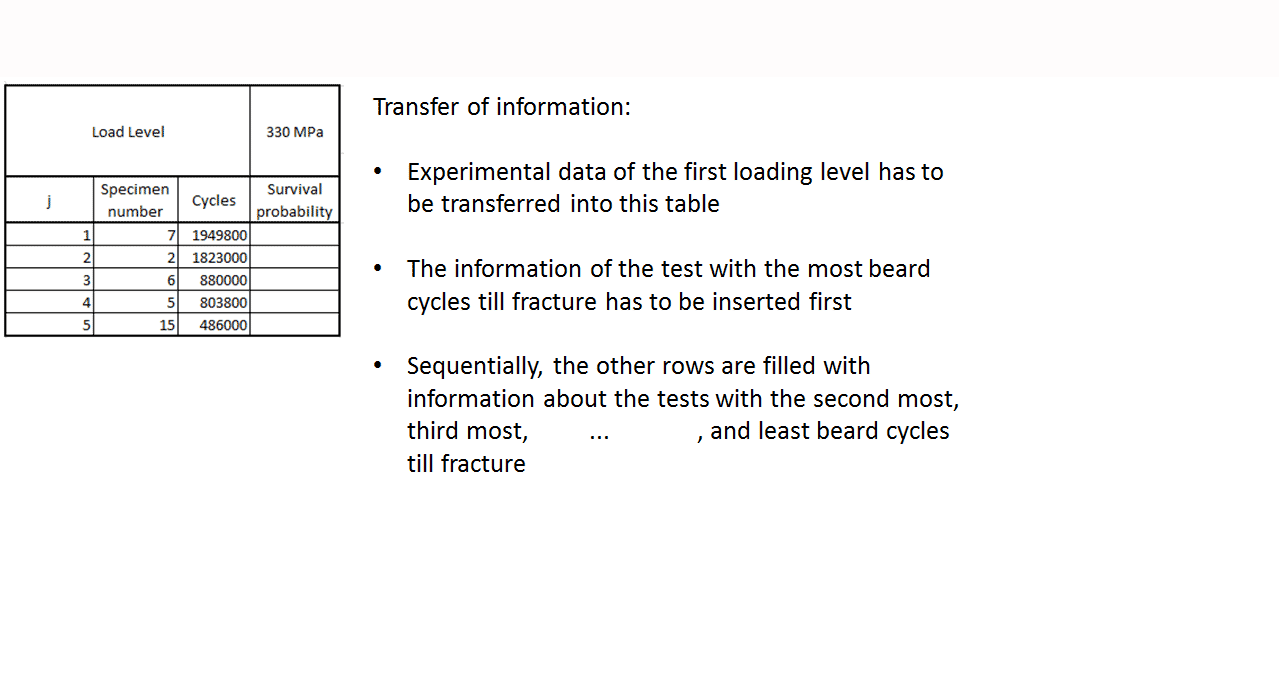
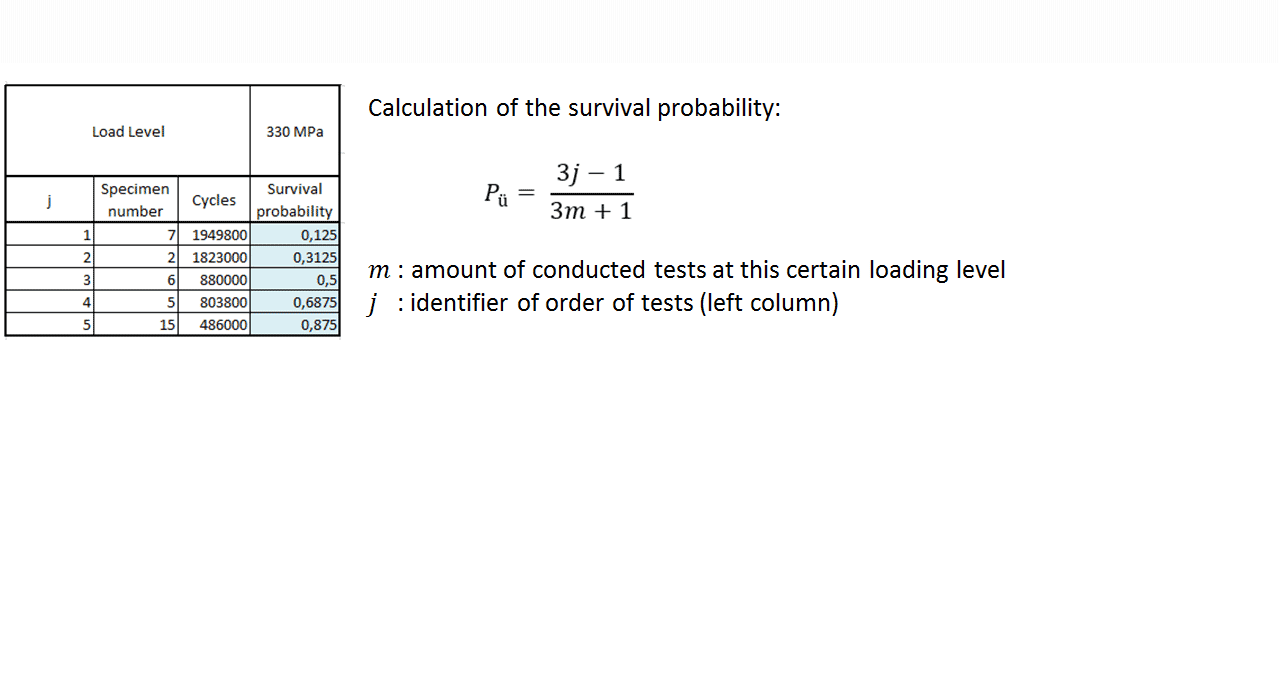
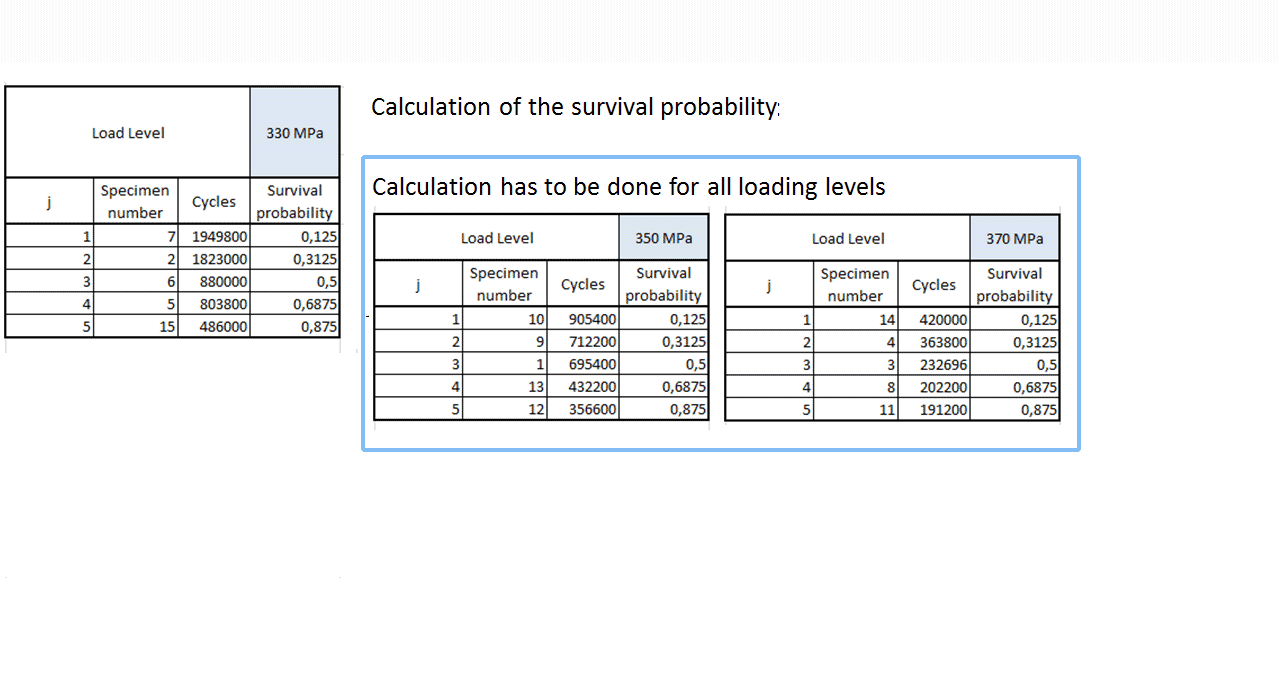
Organization of Experimental Data
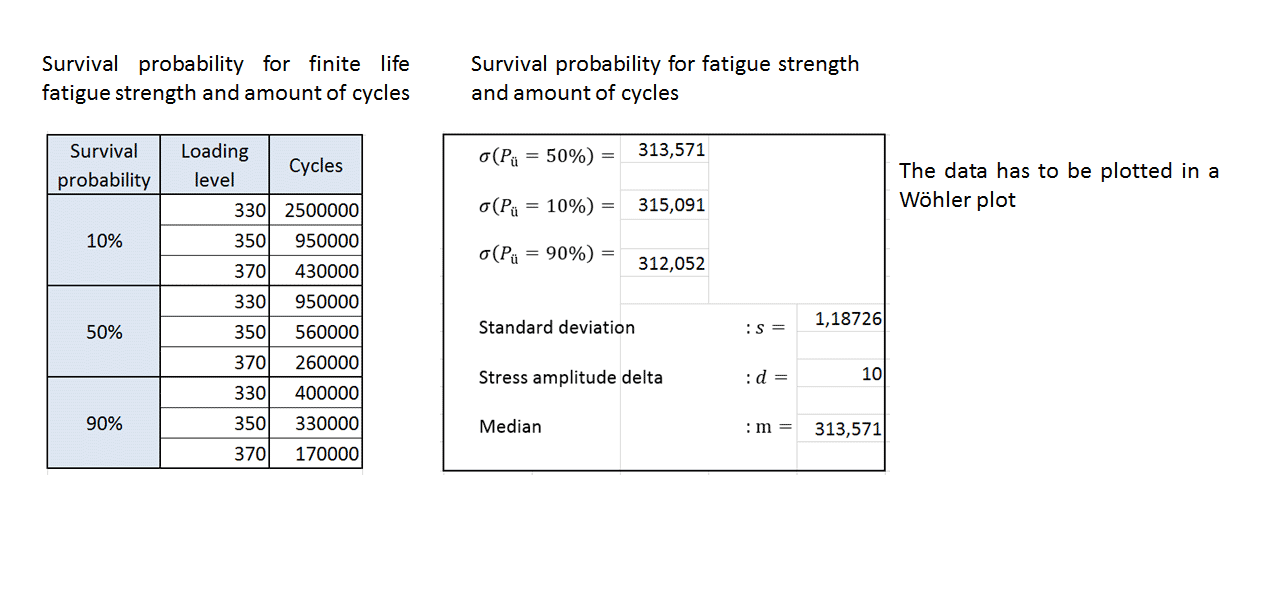
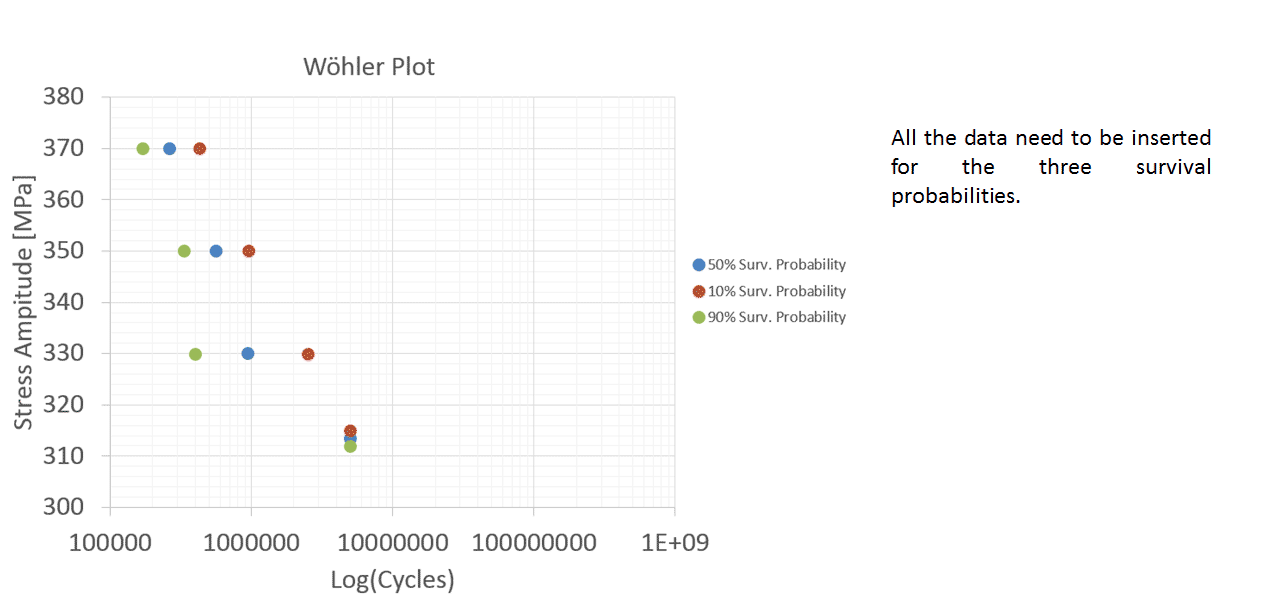
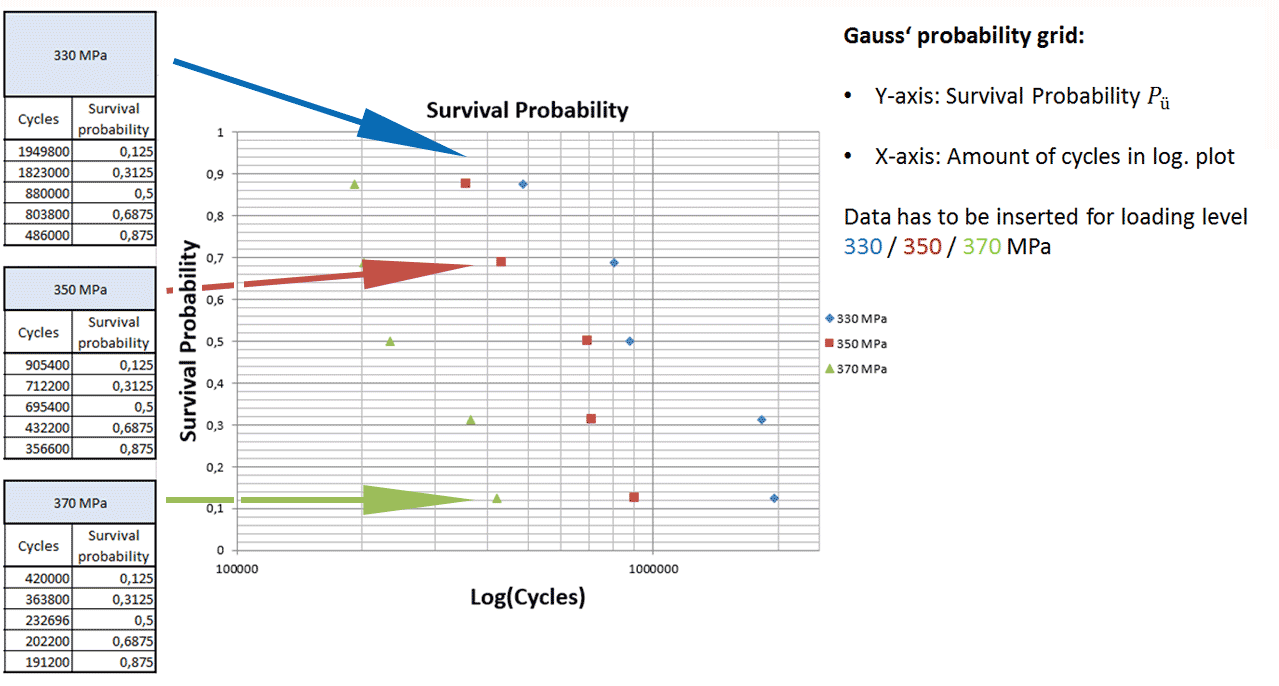
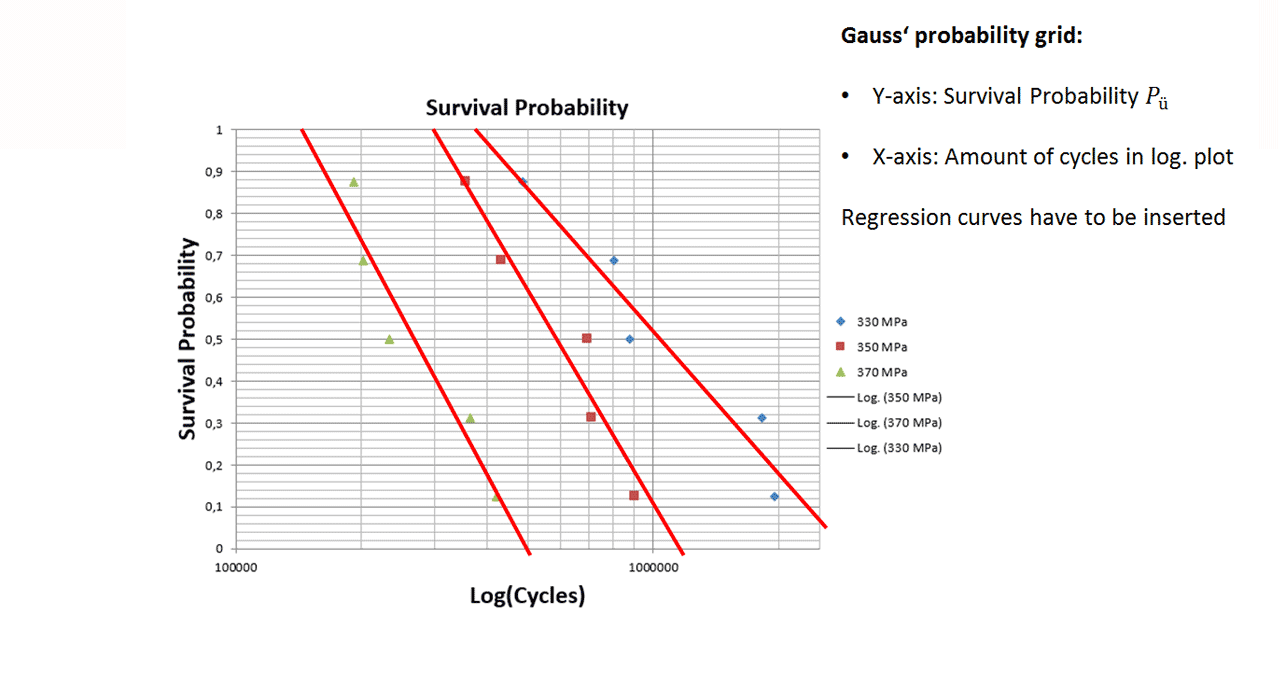
After determination of survival probabilities for finite life fatigue strength the data has to be plotted in a Wöhler line.
1. Measure the thinnest diameter of the specimen.
2. Screw two of the nuts on the one side of the specimen’ thread.
Caution Make sure the nuts are thoroughly tightened and there stands not more than 1 round of the thread proud.
3. Apply some grease with a paper towel on the ball joint socket washer and attach
the ball joint washer on it.
4. Attach the combination of both in the wrapping nut.
Caution Make sure the ball joint washer is facing the bigger opening of the wrapping nut.
5. Repeat it for the other side of the specimen.
1. Switch on the main oil pump (green light flashes up)
2. Activate the supply of the servo hydraulic testing cylinder (press stage
II, then stage III)
3. Activate the path control ("Weg")
4. Activate the specimen prorection ("Probenschutz")
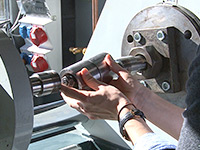
1. Attach grease on the remaining ball joint socket washers.
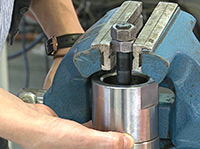
2. Put the specimen in between the clamping device of the machine. The wrapping
nuts can be screwed on by hand.
3. Apply some pressure on the specimen by turning the wheel of the manual
control.
Caution The wheel is highly sensitive.
4. Increase the pressure to ~1.5kN and lock the wrapping nuts with the adequate open end wrenches.
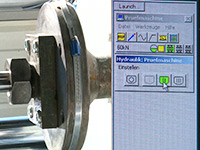
1. Change the mode in the top right corner from “Weg” to “Kraft” by clicking
on “Kraft” and “Betriebsumschaltung” “sofort”.
2. Activate the path boundaries in the middle of the screen.
3. Reset the force to zero.
4. In the lower left hand corner of the display, type into the box underneath
"Ziel" zero and continue your input by pressing the enter key.
5. Execute the parameters by pressing the "start" button. Immediately changes
the force value to the defined value.
6. Reset the amount of cycles by clicking right on it. Choose “Reset” “Diese
Anzeige”.
7. In the box "Amplitude" the force amplitude has to be defined. The value
has to be typed in and continued by pressing the enter key.
8. Start the test by clicking the yellow arrow (“Start”) on the left.

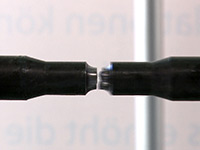
1. When the specimen is broken save the information about the test details on
the record sheet.
2. Deactivate the path boundaries by pressing "Primäre Grenzwerte dieser
Gruppe deaktivieren" and activate the specimen protection “Probenschutz”.
3. Make sure the mode “Weg” is activated.
4. Demount the specimen.
5. Cover the fracture surfaces with synthetic varnish.